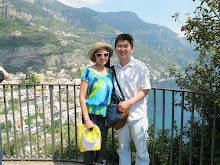
With a little extra money to pay on top of the meal plan, Tommy and I decided to make a reservation at
Le Matiehani, resort's fancy restaurant. We both enjoyed the dinner. The restaurant had about 4-5 tables in the main dining area, and a couple tables outside. We were actually the only couple sitting inside the dining area. It felt like we were in Chinese Soap Opera, where the rich guy reserved the entire restaurant to take his date out for nice dinner, and perhaps even had a rock in his pocket. It was a picture perfect scenario! That didn't happen to us! We just happened to be the only one in the main dining room dining. Either Tommy nor I are rich enough to reserve the entire restaurant just to cater to us. Lastly, hunnie got no rock in his pocket to seal the picture perfect moment! :(
I decided to do a double layout. I made a fancier looking page on one side, and on the other side, I decided make a page of the food we ordered. I used 2 black cardstock papers as the background and used a glitter orange cardstock to layer on top of the black background.

While I was shopping at one of my local scrapbook stores, I noticed they hung a layout on the wall that I couldn't keep my eyes off it. I was inspired by it, and decided to shop in the store for the necessary materials to make my page.
I scroll through my pictures on my iPhone and found the picture that I wanted to use for my layout. From the picture, I chose a color and work along with it to incorporate it with my layout.
The layout above is not 100% exactly the same as the layout I saw at the scrapbook store. It was almost the same concept, but slightly different.
I used a pencil to draw a curve line over the orange cardstock and used a pair of scissor to cut along the line. I kept the top part, and kept the rest of the unused paper in my scrap box for future use. I adhere the picture onto the page and added flowers along the edge where the 2 papers met. I randomly picked different colors and sizes flowers and randomly placed them along the edge. I used runner tapes to adhere the flowers onto the page and added pearls in the center of each flower.
I cut the fonts out from my digital cutter. I decided to size the letters in bigger font to put the title across the page.

On the right side of the layout, I arranged the photos according to appetizer - main course - dessert. I separated our orders. Can you guess which one side was mine?
This page had a lot of pictures and overloaded with information. I kept this page simple. I resized all 6 pictures. I rounded the top right corner of the appetizer picture on the left, the top left corner of the appetizer picture on the right. I also rounded the bottom right corner of the dessert picture on the left as well as the bottom left corner of the dessert picture on the right. I only rounded 4 corners to give a softer edgy look on this layout.

Because I resized the pictures, there was extra space on the bottom of the layout. I found an orange with yellow dots ribbon. The color of the ribbon complimented the layout on the left. I decided to put the ribbon on the bottom of the page on the right.

I purchased a jar of flowers for the layout on the left. Because there were quite a bit of the flowers, I didn't use them all up for the layout. Since there were extra flowers in different color and sizes, I decided to layer the flowers in 3 different sizes to create a giant flower embellishment. I also added a pearl in the middle. I used runner tape to adhere all the flowers together.
We probably spent over 2 hours dining at the restaurant that evening. People in French Polynesia was very relaxed and easy going. We tried to be like them, take things slow and enjoy life. Our dining experience was great, and the food was delicious. With just an additional amount of money to pay for the dinner, it felt like that our meal was a steal! We surely enjoyed our dining experience at Le Matiehani.
 This is one of my favorite pages in this Tahiti scrapbook! This was totally out of my comfort zone and the outcome was amazing! It was a privileged that I was able to go to Tahiti. I was able to enjoy sunsets in Moorea every night. Tommy was able to capture such beautiful sunsets. I couldn't help but must create a layout for it to treasure the memory.
 When I buy paper stacks, if there's matching cardstocks, I would buy them too! I do that because they can easily compliment each other to lessen the headache from time to time, trying to find the right color to match.